Welcome to the BreeCS Help Centre

Initial Setup for BreeCS and Net2

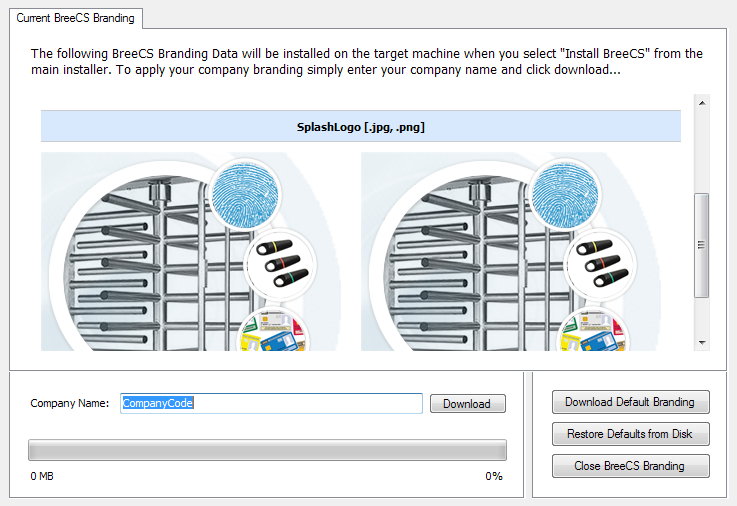
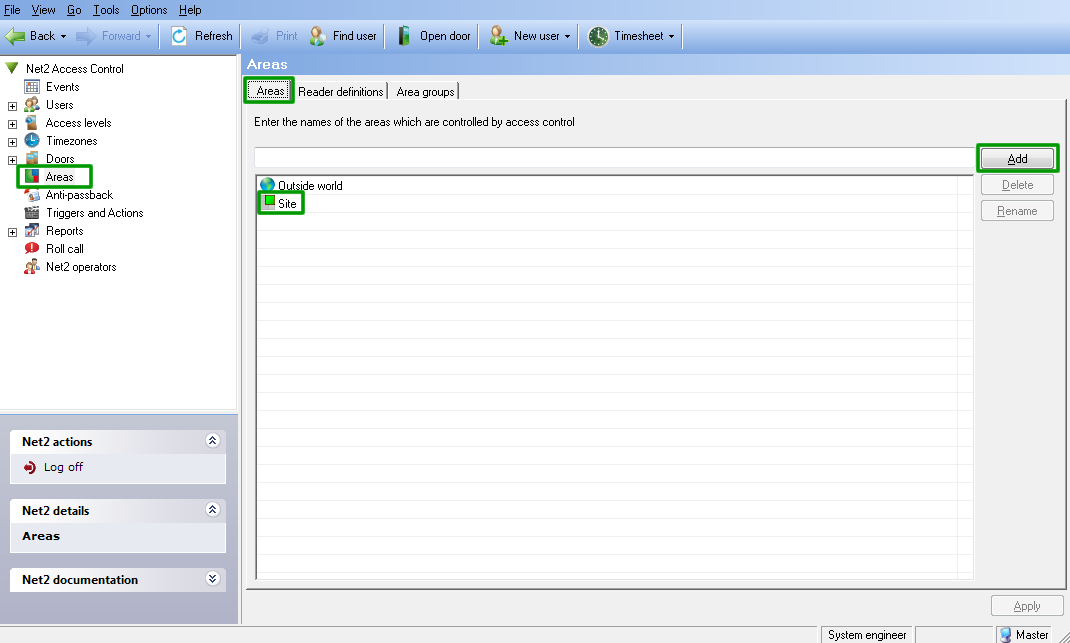
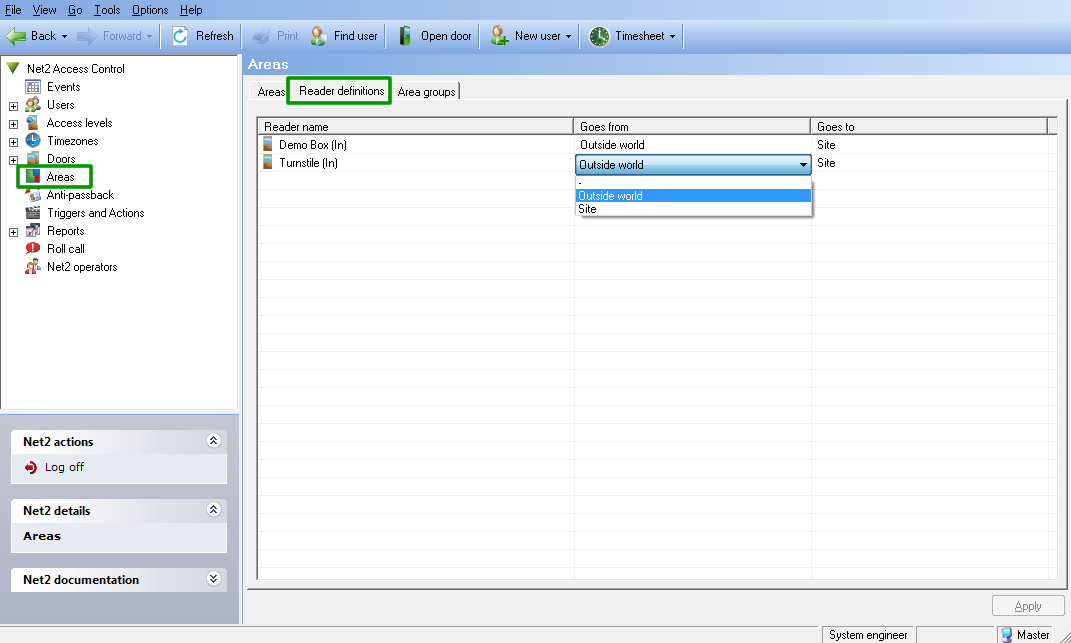
Download the BreeCS Pro installer, extract the contents of the zip file and run the setup.exe file. This will now give you various options for configuring smart access control components on your target machine.

BreeCS can be branded with your company name, logo and website link. Open BreeCS Branding from the installer, enter your company code and click download. The installer now contains your company branding and these data files will be installed when you click the Install BreeCS button.

Open Net2 Configuration Utility and on the General tab set the licensed BreeCS site name.

Open Net2 Configuration Utility and on the Features tab enable Areas, Roll Call and Anti-passback.

Once you have added your ACU's via the TCP/IP options or performed a detect when using a USB to serial converter, click the plus icon next to "Doors" in the left hand side tree view within the main Net2 software. Give your ACU a friendly name, set your "Reader" and "Keypad" type, set your "Token format", select "Token only" from the "Reader operating mode" drop down box and finally select "Turnstile mode" from the "Reader action" drop down box. Once complete, please ensure you apply the settings before moving on to any other ACU's in the list.

Click the "Areas" icon in the left hand side tree view within the main Net2 software. On the "Areas" tab click the "Add" button. Enter a new area name and click "OK". This newly added area will now appear in the list.

Click the "Areas" icon in the left hand side tree view within the main Net2 software. On the "Reader definitions" tab you will see a list of readers. These are the IN readers, all OUT readers will automatically be the reverse of whatever you set for the IN. Select each reader in the list and assign "Outside world" to the "Goes from" column and assign the new area you created earlier to the "Goes to" column. Please ensure to apply these settings once complete.

ALL IN READERS SHOULD BE WIRED TO READER PORT 1 ON THE ACU
ALL OUT READERS SHOULD BE WIRED TO READER PORT 2 ON THE ACU

Once you have installed and configured Net2 Pro and listed above, installed BreeCS Pro and any other required components, launch Net2 and you will see two new icons. Click BreeCS Pro to open the software, enter your license information and BreeCS will be operational. To create a BreeCS desktop icon open BreeCS, login, click "Advanced View", click the "File" menu and finally click "Create Desktop Shortcut".


Can't find what you're looking for?

Get in touch and we will endeavor to answer any questions you may have and help with any problems you are facing.

Get In Touch